The Poor Man's Dialogue Tree
As some of you may know, Lemma has an interactive dialogue system that lets you exchange text messages with an AI character.
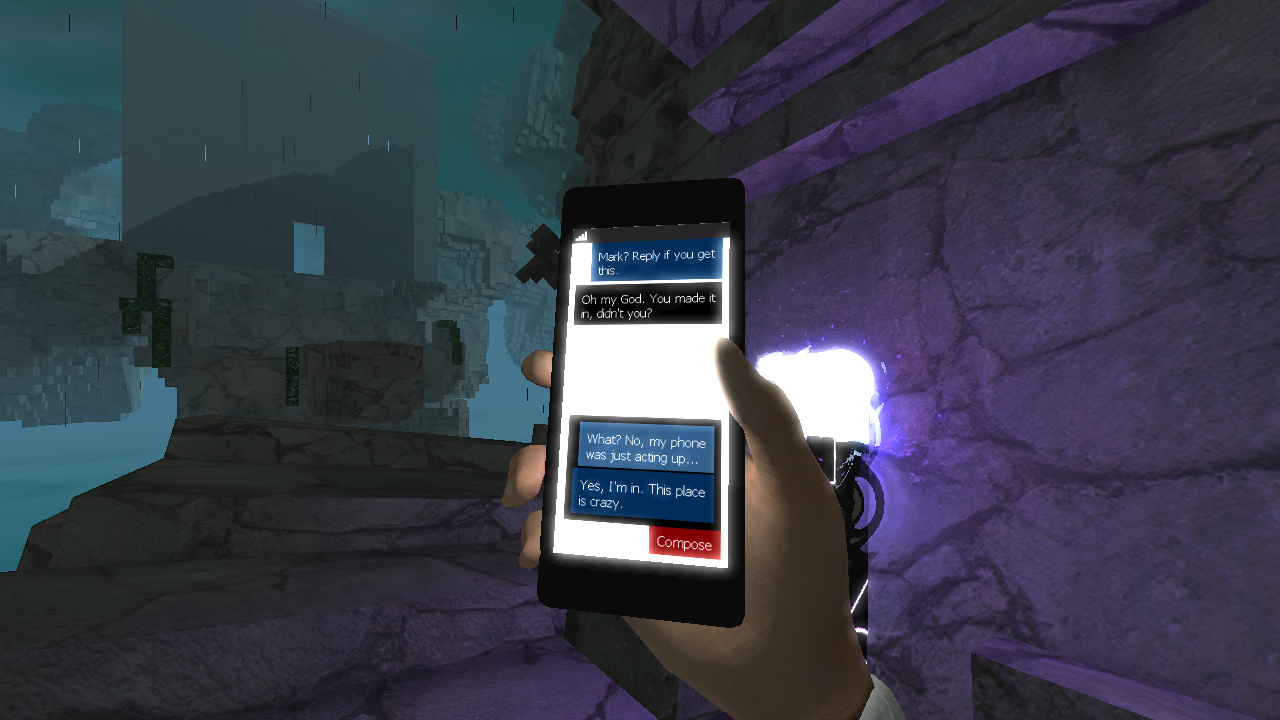
I implemented every conversation manually in code (well, scripts) until this week, when I got fed up and decided to automate the process!
Like the last article in this series, my system has all the hallmarks of a Poor Man's solution: developed in-house, tailor-made, simple, and based on free and open source software.
Step 1: What exactly am I doing
This might shock you, but I decided to model conversations as trees. Hold on to your butts, guys.
The big problem with a purely tree-based system is that the number of branches can easily explode to an unmanageable size. When I was scripting conversations manually, I could use tricky code to express complex behavior without explicitly writing out every possibility.
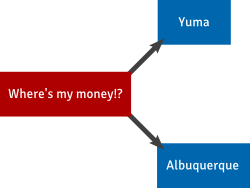
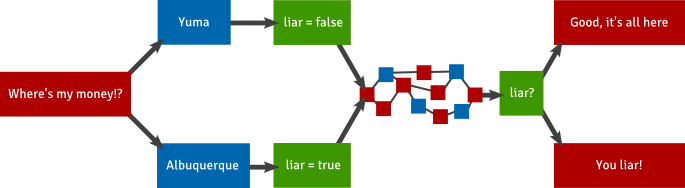
For example: let's say you're making a game about Mexican drug cartels. It's called 4:20 to Yuma. Early in the game, an NPC named Enrique asks you at gunpoint where his money is hidden. You have two choices: tell him where it actually is, or lie.
At that point, technically the entire game splits into two possible outcomes. In our conversation tree model, we would model this as two giant branches.
Now eventually, that choice will have an impact on the game, but in the meantime, Enrique will probably behave the same either way. He'll drag you out to wherever you said the money was. Your choice only has an impact once you reach the destination and Enrique finds out if you told the truth or not.
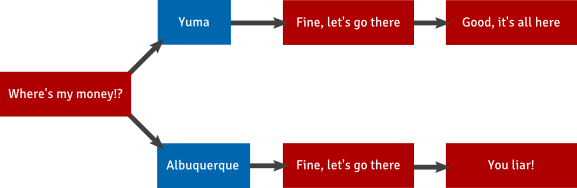
Let's say it's a long journey and there's a lot of dialogue along the way. That dialogue is the same regardless of your initial choice, yet we have to keep two separate copies of it to maintain our initial branches.
This is less than ideal. A purely tree-based model is clearly too simple for our purposes. On the other hand, I don't want to implement a full-on visual programming language because a) that sounds hard and b) the whole purpose of this system is to avoid convoluted code.
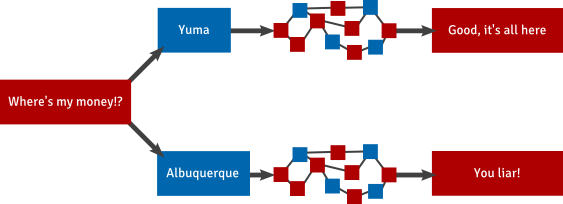
In the end, I decided to add one new construct to our tree-based system: variables. This lets me set a variable, continue on with the rest of my dialogue, and branch based on that variable later, like this:
It's still pretty simple, but much more powerful. An added advantage is that you can easily split the dialogue into multiple files and link them together using variables.
Step 2: Author
I needed a fast, visual way to design dialogue. I immediately ruled out an in-game editor. It would be way too much work to write everything from scratch. I looked at a variety of flowcharting tools before settling on JointJS, an HTML5 flowchart library that integrates nicely with Backbone and jQuery. I dusted off my JavaScript skills and set to work.
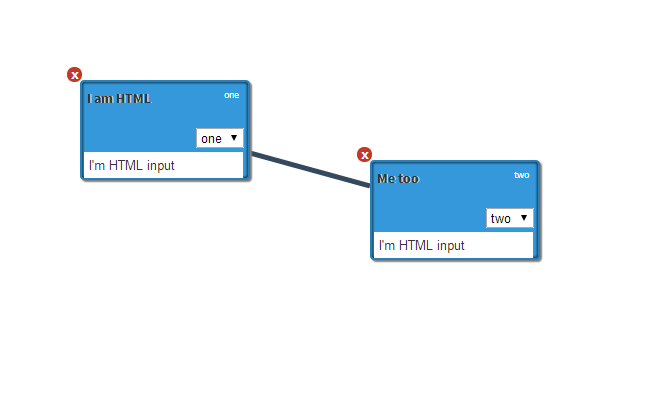
I started with this example, which demonstrates how to combine regular HTML elements with the SVG it uses to render the boxes and connections.
JointJS turned out to be an absolute joy to work with. It has clear separation between the model and presentation layers. Each node is a Backbone model, and it's pretty easy to create a new type of node:
joint.shapes.dialogue = {};
joint.shapes.dialogue.Base = joint.shapes.devs.Model.extend(
{
    defaults: joint.util.deepSupplement
    (
        {
            type: 'dialogue.Base',
            size: { width: 200, height: 64 },
            name: '',
            attrs:
            {
                rect: { stroke: 'none', 'fill-opacity': 0 },
                text: { display: 'none' },
                '.inPorts circle': { magnet: 'passive' },
                '.outPorts circle': { magnet: true, },
            },
        },
        joint.shapes.devs.Model.prototype.defaults
    ),
});
After a whole lot of JavaScript hacking and CSS styling, I ended up with this:
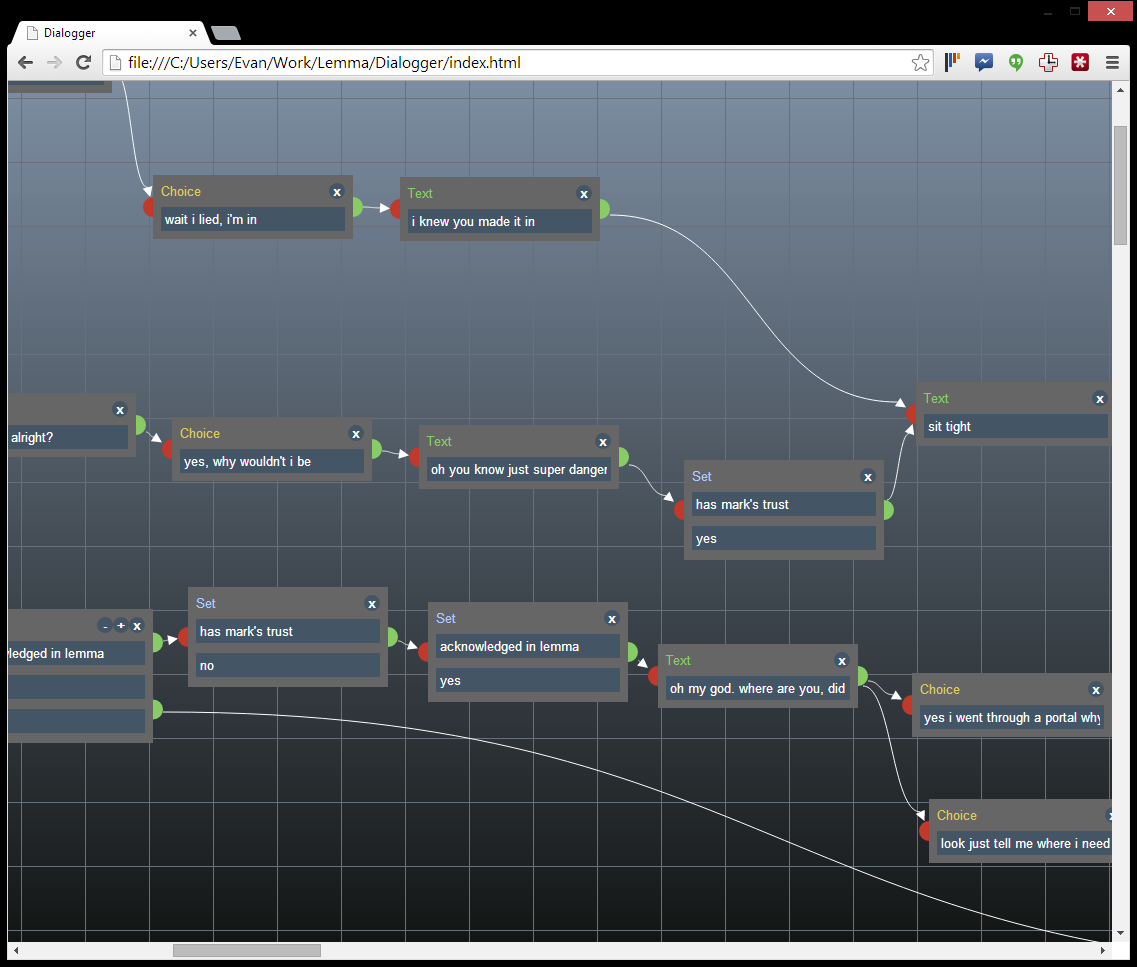
I came up with five node types:
- Text - displays a message from the AI character. Can link to one Text, Node, Set, or Branch, or to one or more Choices.
- Node - does nothing. Can link to one Text, Node, Set, or Branch, or to one or more Choices.
- Choice - presents a choice to the player. Can link to one Text, Node, Set, or Branch.
- Set - sets a variable to a value. Can link to one Text, Node, Set, or Branch.
- Branch - takes one of several paths based on the value of a variable. Each port can link to one Text, Node, Set, or Branch.
I chose these rules to make it easier for the authoring tool to validate the dialogue tree. They still offer a lot of power. You can start execution at any node other than a Choice and it will make sense.
The purpose of the Node type is two-fold. First, it allows me to start a conversation by offering Choices to the player without displaying a Text from the AI character. Second, it allows me to link Branches to Choices, which is useful if I want to offer choices A and B in one case and choices C and D in another case.
The words you see in the Text and Choice nodes are localization markers. I write a few words that describe the gist of the message. Later I write the full message in an Excel spreadsheet and my localization system fills in the correct text (more on that in another article!) The localization marker doubles as a unique identifier that can be accessed in code as well.
Try the demo yourself! Right-click to show the menu. Source code here. Tested in Chrome and Firefox.
Step 3: Export
One great thing about a JointJS graph is that, since it's a Backbone model, it can export and import to and from JSON. It even picks up your custom properties!
Here's my save code:
localStorage[filename] = JSON.stringify(graph);And here's how I load it back up:
graph.clear();
graph.fromJSON(JSON.parse(localStorage[filename]));
Here's how to export the data to a file and have the user download it:
function offerDownload(name, data)
{
    var a = $('<a>');
    a.attr('download', name);
    a.attr('href', 'data:application/json,' + encodeURIComponent(JSON.stringify(data)));
    a.attr('target', '_blank');
    a.hide();
    $('body').append(a);
    a[0].click();
    a.remove();
}
The JSON data includes a lot of information about the visual layout of the graph. This is great because the graph will load up exactly how you left it, but all that extra information can make it tough to parse in your game engine. I found it necessary to write a function that goes through the JSON and pulls out only the parts needed in a game engine.
Step 4: Execute
Almost done! Now we just parse the JSON data, pick an initial node, and start executing the instructions.
I used the excellent Json.NET library for parsing. Here's the entirety of my execution code:
public void Execute(Node node, IListener listener, int textLevel = 1)
{
    string next = null;
    switch (node.type)
    {
        case DialogueForest.Node.Type.Node:
            if (node.choices != null && node.choices.Count > 0)
                listener.Choice(node.name, node.choices.Select(x => this[x].name));
            next = node.next;
            break;
        case DialogueForest.Node.Type.Text:
            listener.Text(node.name, textLevel);
            if (node.choices != null && node.choices.Count > 0)
                listener.Choice(node.name, node.choices.Select(x => this[x].name));
            next = node.next;
            textLevel++;
            break;
        case DialogueForest.Node.Type.Set:
            listener.Set(node.variable, node.value);
            next = node.next;
            break;
        case DialogueForest.Node.Type.Branch:
            string key = listener.Get(node.variable);
            if (key == null || !node.branches.TryGetValue(key, out next))
                node.branches.TryGetValue("_default", out next);
            break;
        default:
            break;
    }
    if (next != null)
        this.Execute(this[next], listener, textLevel);
}
The IListener interface provides four functions: Text and Choice to display messages and choices to the player, and Get and Set for accessing variables. There's not much more to it, but you can check out the full code here.
Conclusion
I think the types of conversations you can express with this system are pretty varied, but if it's not enough it would be very easy to add new kinds of nodes. Go forth and dialogue!
edit: Yes, it's not a tree. It's a directed graph. My bad!
If you enjoyed this article, try these: